A great patio starts long before the paving slabs go down. In fact, the most important part of any patio is the bit you do not see once the job is finished: the sub-base. Get this layer right and your patio has a much better chance of staying level, stable and free-draining for years to come. Get it wrong and you may end up with rocking slabs, sunken areas, puddles, weeds or joints that keep cracking.
Whether you are a landscape builder working on a customer’s garden or a DIYer taking on your own outdoor project, the same rule applies. Good preparation makes all the difference. In this guide, we will explain what a patio sub-base does, how deep it should be, how to prepare the ground properly and which materials can help you build a reliable foundation.
A patio sub-base is the compacted layer of aggregate that sits underneath your paving, bedding layer and jointing. Its job is to spread weight evenly, support the paving above and help reduce movement over time.
Think of it as the foundation of the patio. The paving slabs may be the visible finish, but the sub-base is what helps stop them from sinking, shifting or holding water after wet weather.
A well-built sub-base helps to:
For most patios and garden paths, a compacted sub-base depth of around 75mm to 100mm is commonly recommended, depending on the ground conditions and expected use. Driveways usually need a deeper base because they carry heavier loads.
Most patio problems can be traced back to poor preparation. The paving itself is not always the issue. More often, the base beneath it has not been dug out, levelled, compacted or drained properly.
Common causes include:
Compaction is especially important. A sub-base should be compacted in layers rather than tipped in all at once, as this helps remove air gaps and reduce the risk of future settlement.
Start by marking out the patio area with string lines, spray marker or timber pegs. Take your time at this stage, especially if the patio needs to line up with doors, steps, paths, walls or garden features.
When excavating, you need to allow space for:
As a guide, you will usually need to dig deeper than the finished patio level by the combined depth of all these layers. For many patios, this means removing enough soil to allow for around 75mm to 100mm of compacted sub-base, plus the bedding mortar or sand layer and the paving itself.
Remove all turf, roots, loose soil and organic material. Topsoil is not suitable beneath a patio because it can compress, move and retain moisture. If you find soft patches, dig them out and replace them with suitable compactable material.
Drainage is not something to fix at the end. It needs to be built into the patio from the start.
Your patio should have a slight fall so rainwater can run away from buildings, seating areas and high-traffic spaces. A typical fall for paving is around 1:60, which means a drop of approximately 1cm for every 60cm of patio length.
For example, if your patio is 3 metres deep, you would usually aim for a fall of around 50mm from the highest point to the lowest point.
Good drainage helps prevent:
If the ground is heavy clay, naturally wet or poorly draining, you may need to take extra steps. This could include using a suitable drainage system, increasing the fall, improving the surrounding ground drainage or seeking professional advice before laying the patio.
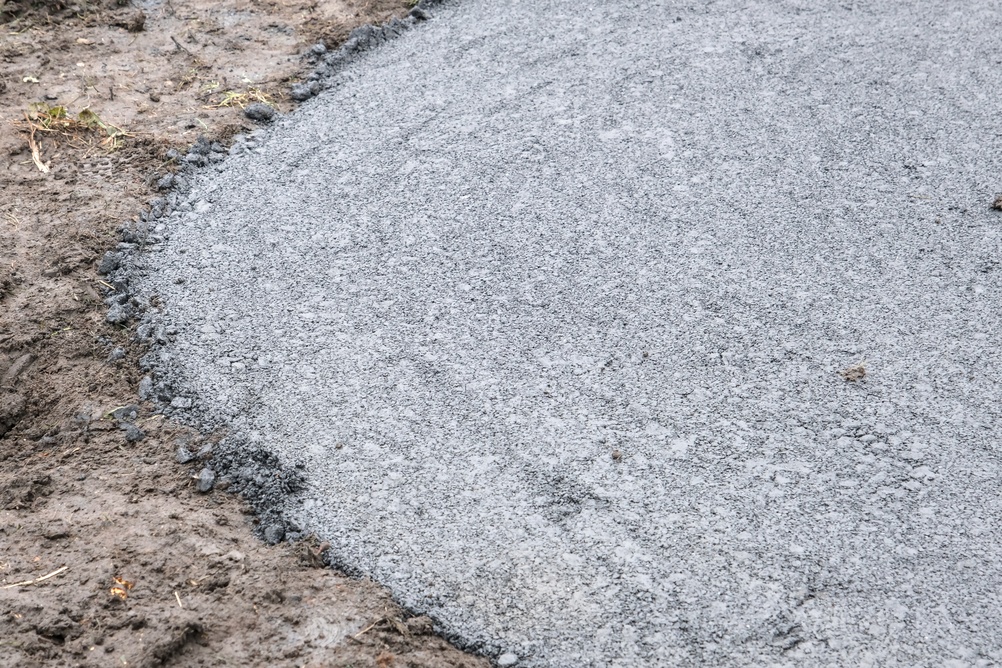
For a traditional patio sub-base, 803 Type 1 Aggregate, also commonly known as MOT Type 1, is one of the most suitable materials to use. It is designed to form a strong, compactable foundation beneath surfaces such as patios, driveways, pathways, roads and car parks.
At KPT Timber, our 803 Type 1 Aggregate is produced using crushed limestone or granite, both of which are hard-wearing materials suited to load-bearing surfaces. Once compacted, it helps create a level and stable construction layer, making it ideal for patio preparation. It is supplied in a bulk bag measuring approximately 90 x 90 x 90cm, with weights varying from around 850kg to 900kg. It also meets the requirements of Clause 803 of the Specification for Highway Works.
Alongside MOT Type 1, other bagged materials may be useful for different stages of a patio or landscaping project.
This is the main product to consider for the patio sub-base itself. It compacts well, creates a firm load-bearing layer and helps provide the stability needed before the bedding layer and paving are installed.
Use it for:
Our 0-4mm Grit Sharp Sand is a coarse-textured sand suitable for construction and landscaping jobs, including paving-related work, concrete mixes and floor screeds. It is often used as part of a bedding or screeding layer, depending on the type of paving and installation method.
Use it for:
Our 0-2 Building Sand is a finer sand typically used for mortar mixes, bricklaying and general building jobs. It is useful on landscaping projects, but it should not be used as the main structural sub-base beneath a patio.
Use it for:
Our 20mm Ballast is a mix of sharp sand and 20mm crushed stone, designed for mixing with cement to make concrete. It can be useful for wider landscaping and construction jobs, such as foundations, footings, driveways, paths and filling voids.
Use it for:
The important point is to use each material in the right place. MOT Type 1 is the key material for the patio sub-base, while sharp sand, building sand and ballast support other parts of the project depending on the specification.
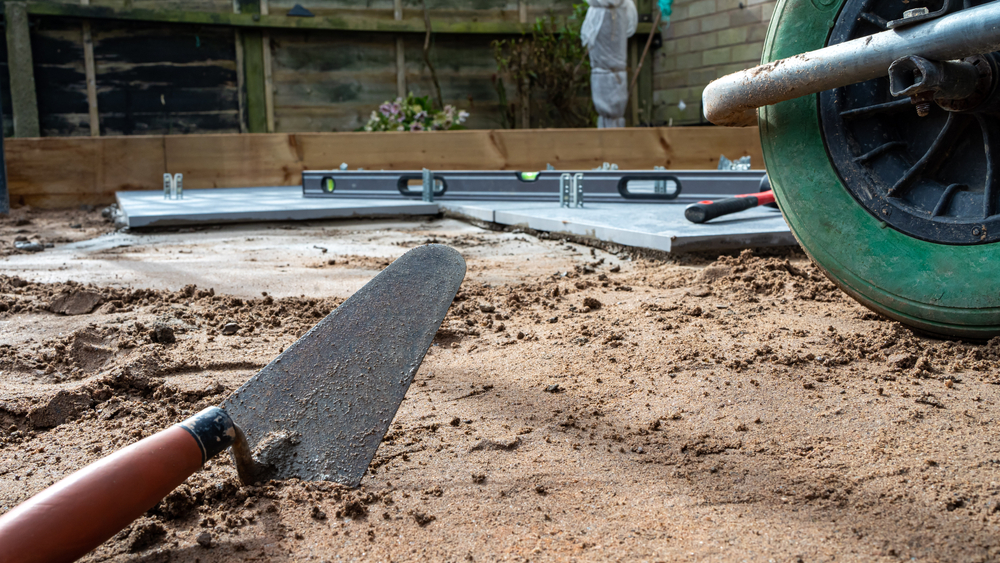
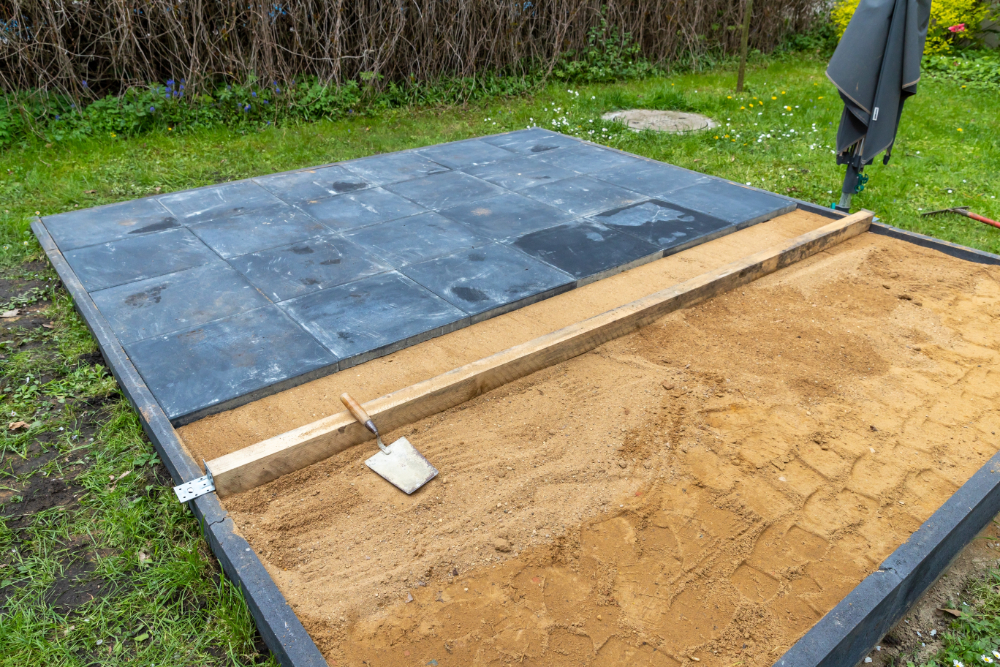
Once the area is excavated and the levels are set, you can begin laying the sub-base material.
Avoid tipping the full depth in one go. A much better method is to build the sub-base in layers of around 50mm, compacting each layer before adding the next. This gives a firmer, more consistent base and reduces the chance of dips appearing later.
A simple process would be:
For most domestic patios, the aim is a firm, stable surface with no soft spots. Walk over the compacted base and check for movement. If an area feels loose or uneven, correct it before moving on.
Before laying the bedding layer, take time to check your levels. This is much easier to correct now than once the slabs are down.
Use string lines, a spirit level, straight edge or laser level to check:
This stage is particularly important for patios that meet doorways, steps or existing paths. A few millimetres out at the base stage can become a much bigger issue by the time the paving is laid.
The bedding layer sits between the compacted sub-base and the paving slabs. Its role is to help position the slabs correctly and provide full support beneath them.
The right bedding method depends on the type of paving being laid. For many paving slabs, a full mortar bed is preferred because it gives proper support and reduces the risk of movement or hollow spots. For some applications, sharp sand may be used as part of the bedding or screeding process, but the bedding method should always be matched to the paving type and the manufacturer’s laying guidance.
Porcelain paving, for example, usually requires a suitable full mortar bed and priming slurry to help achieve a proper bond. Natural stone, concrete paving and other slab types may have different laying requirements.
The key point is simple: do not rely on the bedding layer to fix a poor sub-base. The bedding layer should fine-tune the paving position, not compensate for unstable ground underneath.
A patio sub-base is not difficult in principle, but small shortcuts can create long-term problems.
Avoid these common mistakes:
The amount of material you need depends on the size of the patio and the required depth.
As a simple calculation:
Length x width x depth = volume
For example, a 4m x 3m patio with a 100mm sub-base would be:
4 x 3 x 0.1 = 1.2 cubic metres
Bulk bags are useful for larger landscaping projects because they reduce the need for multiple smaller bags and can be delivered directly to site. KPT Timber’s bulk bags of aggregates are supplied in 90 x 90 x 90cm bags, with approximate weights generally ranging from 850kg to 900kg depending on moisture content.
For accuracy, always allow for compaction, wastage and site conditions. If in doubt, it is better to check quantities before ordering rather than running short partway through the job.
For most domestic patios and garden paths, a compacted sub-base depth of around 75mm to 100mm is commonly used, depending on the ground conditions and expected use.
No. Paving slabs should not be laid directly on soil because the ground can move, compress and hold water. A properly prepared sub-base gives the patio much better stability.
Yes. Compaction is essential. Without it, the sub-base can settle over time, which may cause dips, movement and uneven paving.
No. Sharp sand has coarser, angular grains and is often used for paving, screeding and concrete-related jobs. Building sand is finer and is commonly used for mortar mixes.
A patio may hold water if it has not been laid with enough fall, if the sub-base is not draining properly, or if the ground beneath is too compacted or poorly prepared.
A patio that stays level, drains properly and feels solid underfoot depends on careful preparation. The best-looking paving in the world will struggle if the sub-base beneath it is too shallow, poorly compacted or unable to deal with water.
Take the time to excavate properly, choose the right materials, compact in layers and plan the fall before you begin laying slabs. It is not the most glamorous part of a patio project, but it is one of the most important.
At KPT Timber, we supply a wide range of bagged products for landscaping and building projects, including 803 Type 1 Aggregate, 0-4mm Grit Sharp Sand, 0-2 Building Sand and 20mm Ballast. Whether you are preparing for a patio, path, concrete base or general garden build, our team can help you choose practical materials for the job.