The second part of our Step By Step Guide To Laying A Patio will enable you to finish the patio laying process and give you a great result that will be ready to be enjoyed all summer long. If you missed part 1, you can find it here.
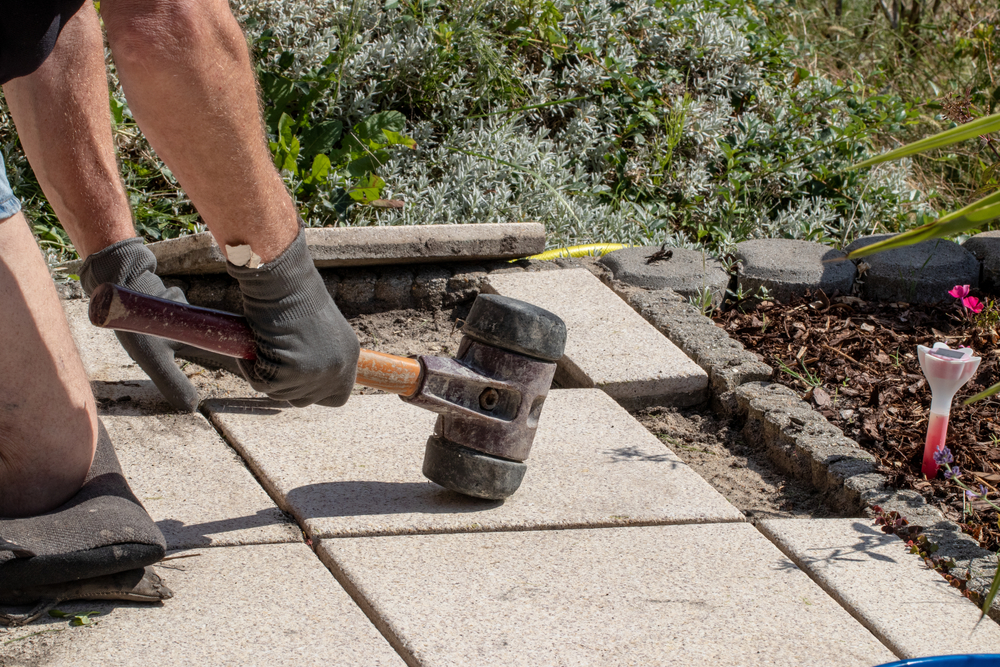
Laying the first slab correctly is crucial as it will act as a guide for all of the rest. They should be bedded in a mortar mix containing four parts sharp sand and one part cement. Mortar will need to be used within two hours before it starts to dry so only make what you think you can use in that time. Bear in mind that warmer weather quickens the drying process.
Step 1
Start in one corner of the highest point of yoru sub-base. Lay approximately 60mm of mortar on top and just enough for the first slab. Brush water onto the back of the slab, this will improve adhesion and make it easier to adjust it into position. Place the first slab on top of the mortar and use a club hammer and a piece of timber to tap the slab into position. Be careful not to crack the paving slab. Fill any gaps underneath the slab with mortar and use a trowel to keep the edges flush.
Step 2
Using your first slab or ‘key slab’ as your starting point, you can now lay your first row of slabs in the direction of the slope. Create spacers using pieces of cut dowel or timber and position them in each joint to ensure they stay equal. Continue to check the surface remains flat and the fall is kept to using a spirit level. Once your first row is complete the next ones to lay will be the slabs along the two adjacent outer edges.
Step 3
You can now fill in the rest of the area a row at a time. Use a line nailed to pegs at each end of each row to ensure your surface remains level. Continue to check the fall and that the surface remains flat as you go.
Step 4
Leave the mortar to dry for at least 48 hours. If it’s particularly wet weather, you could cover your patio with a tarpaulin to give it some protection from the rain. Make sure you choose a dry day to complete your project. Once the mortar is dry, you can remove the spacing pegs.
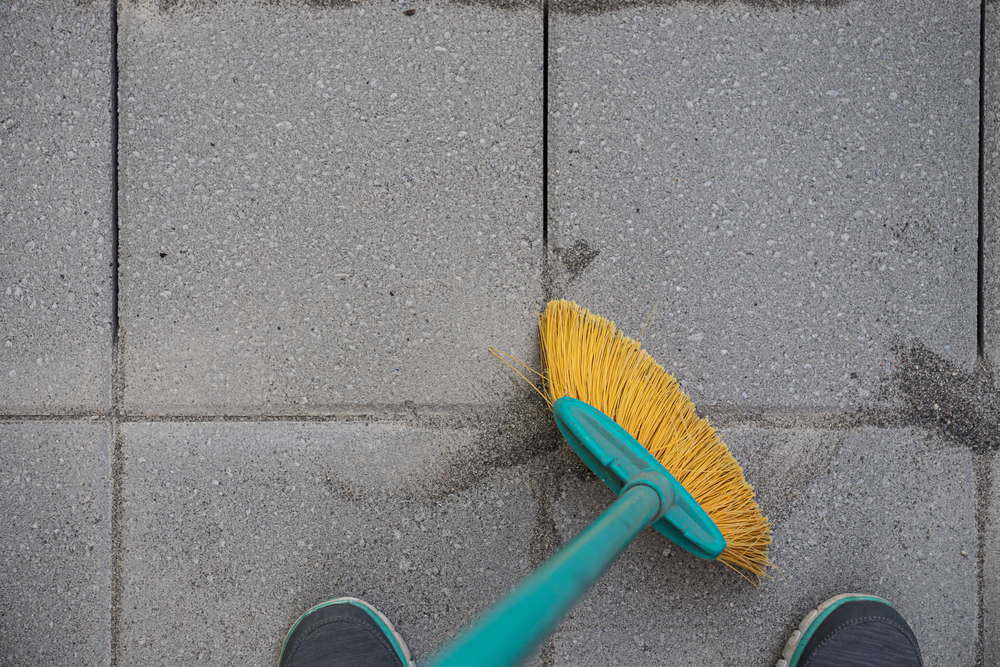
The final step in laying your patio, jointing is the process of filling in the gaps between the paving slabs and will provide a strong, durable and level surface. There are different techniques that can be used depending on the size of the gaps between the slabs. It's important to only carry out jointing when the mortar underneath is completely dry.
For Joints Less Than 5mm:
Guide kiln-dried sand into the joints between the slabs using a soft brush. This can then be finished by sweeping the surface of the whole patio to ensure that it's free of loose sand.
For Joints 5 to 10mm:
Joints of this size are best filled using a dry mixture of one part sand and one part cement. The use of cement results in a stronger finish, and the mixture will set over the first few days as moisture in the ground is absorbed. This can be brushed into the joints using a soft brush and compressed using a jointing tool.
For Joints Over 10mm:
Larger joints are best finished with a wet mortar mix containing four parts sand to one part cement. The mortar should be worked into the joints using a trowel and pushed down firmly using a jointing tool. Be sure to brush away any excess on top of the slabs because the mortar could stain them.

Patios are generally easy to maintain and are durable. Frequent brushing and washing can prevent algae accumulation and keep your patio looking great. The joints are crucial to the stability of your patio, so take care of them by filling up any gaps that develop over time and eradicating any weeds that emerge.
View all of our patio and paving packs here - we have something to suit all tastes and match all styles.